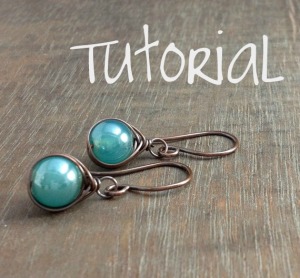
These earrings are a twist on the herringbone weave. They make these beaded drops a little more special than just using a head pin. You can use almost any bead you like for these earrings, although I do not recommend a flat coin or flat oval bead. For this tutorial you will need: round nose pliers, chain nose pliers, wire cutters, two 8-10″ lengths of 24 gauge wire, two 2 1/2″ lengths of 20 gauge wire or two pre-made ear wires, and two beads of your choice.
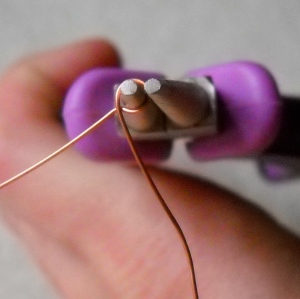
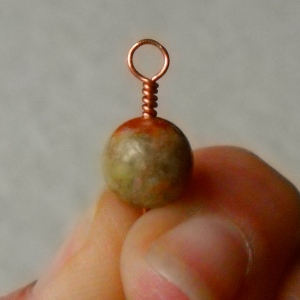
To start you will need to make a loop in the end of your length of 24 gauge wire. I have chosen to use copper wire.
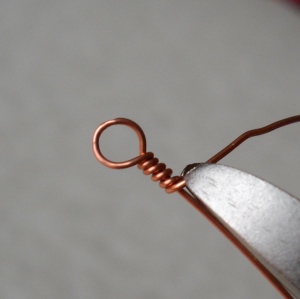
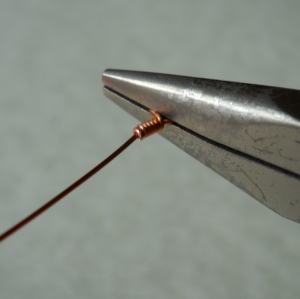
You will want to wrap it about 5 or 6 times, so that you will have approximately 1/4″ above your bead to wrap your weave around.
Cut off any excess wire with your wire cutters.
And smooth down the edge with your chain nose pliers.
You may also want to use your chain nose pliers to flatten the loop.
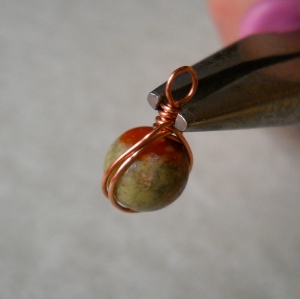
Now take your bead and slip it on. For this demonstration I am using an 8 mm round Autumn Jasper.
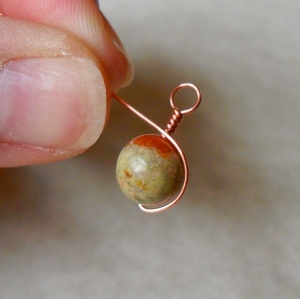
Taking the length of wire begin wrapping the wire around the bead halfway.
Before you continue wrapping your wire the rest of the way around the bead, wrap it once around the base of the loop.
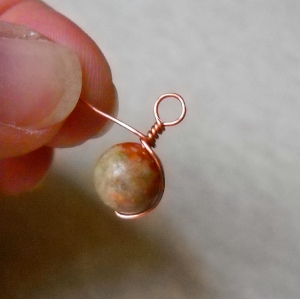
Now you will continue wrapping the wire all the way around the bead until you reach the base of the loop once more. You want to keep the second wrap in front of the first.
And once again wrap it around the base of the loop one time
Next, wrap the wire around the bead for a final time. This time wrap the wire behind the first wrap.
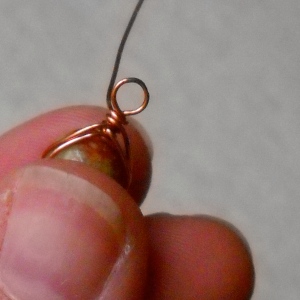
When you reach the base of your loop, wrap the wire around once or twice to secure it.
Remove any excess wire with your wire cutters.
And smooth down the end with your chain nose pliers.
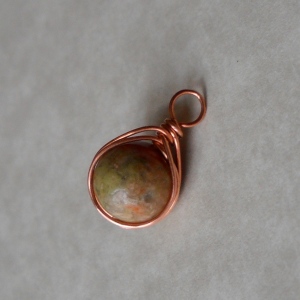
And you have finished one drop!
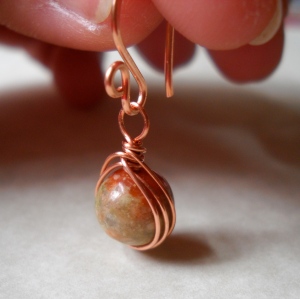
Either using pre-made, store bought ear wires or making you own, attach the drop to finish the earring.
Follow the above steps to complete the other earring.
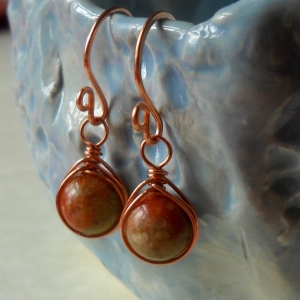
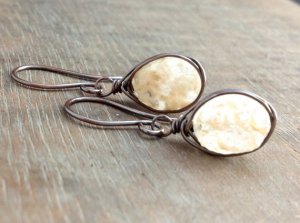
You can use a variety of beads and different wire to make these earrings. You can also use liver of sulfur to give them an antiqued look like I have in this pair.
The possibilities are endless! Have fun!






These look fun and easy. They also look like earrings I would wear a lot! Thank you so much!
You’re very welcome!
I’m new to working with wire. I’ve seen a lot of videos and turorial on line and after trying several I thought maybe I should just give up. After finding your blog and this great tutorial I made 2 pairs in about 20 minutes. I can do it! Thanks for sharing with all of us. I am so enthused that I might just look up a class on metal smithing. I always wanted to do it but at 62 I thought maybe it was too late in life to learn. Maybe not. Thanks again.
Yay! I took a metal smithing class a few years ago and it was so much fun! It’s never too late to follow your dreams!
It’s never too late!
Love this tutorial!!! ❤
I'm 61 & still LOVE learning! (Soon to be 62, too)
I made earrings using your tutorial and I just love them! I posted pictures of them on my blog at http://www.lisayangjewelry.com and a link to your tutorial so other people can enjoy it. Thank you so much for sharing!
Thank you for the shout out! Your earrings turned out great 🙂
Muchas gracias por compartir, está, muy claro todo, desde ahora te habré de seguir. En facebook figuro como María Jimeno, te seguiré desde allí. Besos. Peque
🙂
Me puedes encontrar en Google https://www.google.com.ar/#hl=es&gs_nf=1&cp=27&gs_id=3p&xhr=t&q=joyas+artesanales+en+piedra&pf=p&sclient=psy-ab&oq=joyas+artesanales+en+piedra&aq=f&aqi=&aql=&gs_l=&pbx=1&bav=on.2,or.r_gc.r_pw.r_qf.,cf.osb&fp=f2a83b6b6fa1c6e3&biw=800&bih=509
JOYAS ARTESANALES PEQUE DIEZ, SANTIAGO DEL ESTERO …
those are gorgeous! thank you
You’re very welcome 😉
I used flat faceted beads and they came out nice. I made a slight modification to you design to incorporate the earwire (rather than making them as drops) – bit the wrap holds just fine. They are one of my ‘new’ favorite earrings. You can see pictures here: http://lisayangjewelry.blogspot.com/2012/05/herringbone-earrings-that-dont-dangle.html
I love your variation! Very cute 🙂
Thanks for the free tutorial. I have been making jewelry for a long time and have always wanted to know how to do this wrap. 🙂
You’re very welcome 🙂
Thank you!
Found this on Pinterest…I will definitely be making these.
You’re welcome! I hope you find it helpful 🙂
Thank you so much for sharing. I can’t wait to try it.
You’re welcome 🙂
I might be missing something, but the second two bottom loops don’t seem to stay put on the bead. They slide right off though they’re wrapped at the top. Does that make sense? How to do I keep the two loops intact alongside the bead?
You might try holding the wires in place while you wrap. If they are sliding along the bead a you wrap them, they will end up being to small to stay in place. Also, make sure you’re overlapping them like I have in the photos. Hope that helps!
gorgeous and elegant with a splash of style….thanks for sharing this idea!
You’re welcome 😉
Thank you for the how to on the earrings.I was wondering about the pink tool you are using looks like it would not mar the wire as much as the metal. I love all your pins! Lori
You’re welcome! The pink is simply the handles of my chain nose pliers. These are great pliers, but I can’t remember the brand name. I picked them up at either Michael’s or Hobby Lobby 🙂
Hi Heidi, I am a designer as well and these earrings are awesome, I especially like the oxidized ones.
I’ll have to give this a try!
Liz
Such a great tut!! Clear and precise pics and instructions!!
This is a great looking tutorial. I’d love to try and make them. I’m a beginner.
This is a great tutorial for a beginner 🙂
Beautiful Idea!!
My job has done a “Re-Do” of what to wear and what not to wear. My red-beaded co-ordinated lanyard is no longer allowed. We now can only wear gold, silver and platinum jewelry. I what to make my jewelry gold since I’ve been with the company for over 10-years and these earring are just perfect and look to be at the required size. Thank you sharing your lovely earrings, Heidi.
I was inspired by these earrings and decided to give it a whirl. While mine turned out quite differently (due to materials and bead choice) I loved the inspiration from your site. I made a post on my blog about the earrings I made and linked to this tutorial as my inspiration. Thanks so much for posting! (Check it out here http://notionsandnibbles.wordpress.com/ )
How pretty, and easy to make! Thank you..
How far from the end of the wire do you make the loop before you start wrapping? Also, is the wire pliable enough to just wrap with your fingers? As you can tell, I’m very new to this craft.
Do you happen to know a place called Davis Art Center? There is also someone named Heidi, and she is really good at crafts too. I really like the earrings, and I’m going try and make one of these for a friend. Can you use regular scissors to cut the wire?
Searching in Google brought up your website – I’m thankful it did, many thanks.
lovely earrings and great photos.
Thank you 🙂
Another wonderful Tutorial! Thank you! Easy to follow. Also I did the wrap portion in the 20 gauge as well as your 24 gauge both turned out great! Thanks so much for your time and effort on these. Really nice!
Reblogged this on Zsazsas Beads and commented:
Well…that is one even I can make 🙂 Thank you for this great idea!
Cute! I’ve always wanted to try this technique out.
I just made a pair and they’re simple and gorgeous. Love love love wrapped jewelry. Thank you very much for the simple and straightforward tutorial!
Your pictures are so very helpful! Thank you!
Awesome tutorials ! Thank you
Just found this while searching for earring wire tutorials. Thanks!
Love this tutorial!!! ❤
Heidi, these are very cute earrings. In the second one I see a white bead – may be pearl. In that case do you still use liver of sulfur for patina? I am going to give this tutorial a try. I have done herringbone style before but like the cuteness of this one. Thank you for sharing it free. I am also Face booking it . You’ll find me in Fb under Alankarshilpa jewelry and Dita Basu.
If you are ever unsure of your gemstone, you can oxidize the wire prior to wrapping the stone 🙂
Hi! Your tutorial is GREAT! You have perfect photos and easy to understand instructions. Thank you for allowing those of us who enjoy beading to learn from you. Your design is nice and makes a very nice and attractive earring. I have been beading for many years but am just now wirewrapping. I want to make earWIRES for my own earrings and just have not spent the time nor looked to find what SIZE wire to use (which you have stated….a 20 I believe). What I am wondering is: what do I use on the end of the earwire that goes through the ear to make it smooth to slide easily and painlessly? I would very much appreciate your help and am thanking you very much for your time. Many Blessings to you and yours. Very Sincerely, Dee Jannise
I use a jeweler’s file to smooth my ends. You can also use sand paper or a wire rounding tool. Thank you!
I love this tutorial! Thank you! Would you mind sharing the name of the stone in the last photo (the liver of sulfur pair)? Thanks again:)
That is autumn jasper. Glad you enjoyed the tutorial!